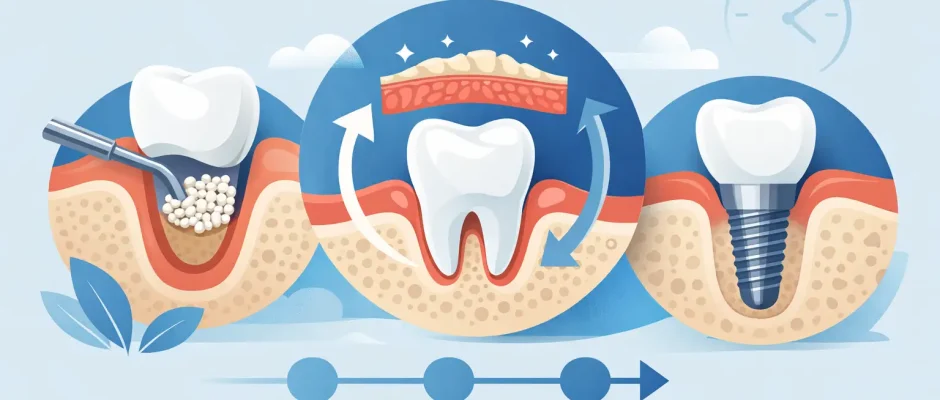
A missing tooth does not only leave a visible gap. Over time, the jawbone in that area can lose height and width because it no longer receives chewing pressure. For an implant to be stable and positioned correctly, the available bone must support it on all sides. Understanding the dental bone grafting stages helps replace uncertainty with a clear treatment sequence: diagnosis, grafting when indicated, controlled healing, and implant placement at the right time.
Bone grafting is not automatically required before every implant. Many patients have enough native bone for immediate or conventional implant placement. Others need a small localized graft after an extraction, while more complex cases may require guided bone regeneration or a sinus lift. The correct approach depends on three-dimensional imaging, the quality of the existing bone, the desired implant position, and the final restoration plan.
When Is a Bone Graft Necessary?
Bone loss can develop after an extraction, periodontal disease, infection around a tooth, trauma, or long-term use of removable dentures. In the upper back jaw, the maxillary sinus may also enlarge downward after tooth loss, reducing the vertical space available for implants.
The goal is not simply to create more bone on an X-ray. The goal is to create a stable foundation that allows an implant to be placed in a biologically safe, prosthetically correct position. An implant placed only where bone happens to remain can lead to compromises in crown shape, hygiene access, appearance, or long-term load distribution.
Sometimes grafting and implant placement can be completed during the same surgery. This may be appropriate when the implant has strong primary stability and the defect is limited. In other situations, placing the graft first and allowing it to heal is the safer, more predictable protocol. A staged approach takes longer, but it can reduce unnecessary risk in cases with significant bone deficiency.
Dental Bone Grafting Stages: From Planning to Implantation
1. Clinical Examination and 3D Diagnostics
Treatment begins with an examination of the teeth, gums, bite, and the area planned for restoration. A cone beam CT scan provides a three-dimensional view of bone volume, density, nearby tooth roots, nerves, and the maxillary sinus. This is especially relevant in the posterior lower jaw, where the mandibular nerve must be protected, and in the upper jaw, where sinus anatomy affects planning.
At this stage, the surgeon also evaluates why bone was lost. If inflammation, periodontal disease, a failing tooth, or infection remains untreated, grafting alone will not solve the underlying problem. A healthy, stable soft-tissue environment is part of successful regeneration.
Digital planning helps determine whether the patient needs a minor socket-preservation graft, horizontal or vertical augmentation, sinus lift surgery, or no graft at all. It also allows the implant position to be planned from the final crown backward, rather than making decisions during surgery without a complete map.
2. Preparing the Site
If a non-restorable tooth needs removal, extraction is performed as atraumatically as possible to preserve the thin bone walls around it. This is particularly important in the visible front area, where even a small collapse of the ridge can affect the gum contour around a future crown.
When an extraction socket has lost bone walls or has a high risk of shrinking, bone substitute material may be placed into the socket. This is often called ridge preservation. It does not eliminate all natural remodeling after extraction, but it can preserve a more favorable volume for a future implant.
Before surgery, patients receive individualized instructions regarding medications, smoking, oral hygiene, and meals. Smoking and nicotine exposure can significantly impair blood supply and tissue healing, so reducing or stopping nicotine use is a meaningful part of the treatment plan, not a minor recommendation.
3. Graft Placement and Membrane Protection
During grafting, local anesthesia is used to keep the procedure comfortable. Depending on the clinical indication, the graft may consist of a processed bone substitute, the patient’s own bone, or a combination of materials. Each option has different handling properties and indications. The best material is not universal – it depends on defect size, location, healing conditions, and the planned implant timeline.
For guided bone regeneration, the graft is shaped and placed where additional volume is needed. A barrier membrane may then cover the graft. Its role is to protect the space while slower-growing bone-forming cells regenerate the defect, rather than allowing soft tissue to fill it first.
The flap is repositioned and sutured without excessive tension. This technical detail matters. Stable wound closure protects the graft during the early healing phase, while membrane exposure or infection can compromise the result. In selected cases, PRF, made from the patient’s own blood, may be used to support soft-tissue healing and improve handling of the surgical site.
4. Early Healing After Surgery
The first several days are usually characterized by mild to moderate swelling, tenderness, and sometimes bruising. These effects are expected after oral surgery and are managed with prescribed or recommended medications, cold compresses during the first day, a soft diet, and careful oral hygiene.
Pain is not the only measure of healing. A site can feel comfortable while deeper bone remodeling is still underway. Patients should avoid testing the area with their tongue, chewing directly on it, or brushing aggressively over the incision. Follow-up visits allow the surgeon to evaluate the tissues, remove sutures when appropriate, and identify early concerns before they become larger problems.
Contact the clinic promptly if there is worsening swelling after the initial days, persistent bleeding, fever, foul taste, pus, increasing pain, or a feeling that graft particles are repeatedly coming out. These signs do not always indicate a serious complication, but they should be assessed rather than watched at home.
5. Bone Maturation and Monitoring
New bone formation is gradual. The graft material serves as a scaffold, while the body builds and remodels bone within the treated area. The time required varies widely. A small socket-preservation procedure may need a few months before implant placement. Larger horizontal or vertical grafts commonly require a longer maturation period, often four to nine months depending on the defect and technique.
A sinus lift follows a similar principle. When bone height below the sinus is limited, the sinus membrane is carefully elevated and graft material is placed beneath it. In some cases, an implant can be inserted during the same procedure. When the remaining bone is too limited to stabilize an implant, the sinus graft is allowed to mature first.
Follow-up imaging is used selectively to confirm that the site has developed sufficient volume for the planned implant. The decision is based on more than elapsed time. The surgeon assesses bone dimensions, tissue health, graft stability, and whether implant placement can be performed in the planned restorative position.
6. Implant Placement and Osseointegration
Once the grafted site is ready, the implant is placed according to the digital plan. A surgical guide may be used in suitable cases to transfer the planned position accurately to the surgical field. This can be especially valuable in complex anatomy, multiple implants, and esthetically demanding areas.
After placement, the implant needs time to integrate with the bone. This process is called osseointegration. Depending on stability, bone quality, and the restoration plan, a temporary tooth may be possible, or the implant may remain protected beneath the gum during healing. Immediate loading can be an excellent option for carefully selected patients, but it should not be treated as a shortcut when the clinical conditions do not support it.
The final crown or bridge is made after the implant and surrounding tissues have stabilized. Good long-term outcomes depend on precise implant position, a cleansable restoration, healthy gums, bite control, and regular professional maintenance.
What Determines the Timeline?
There is no responsible one-size-fits-all answer to how long bone grafting takes. A patient with a small defect after a recent extraction may move to implant placement relatively quickly. Someone with advanced bone loss, a sinus-related limitation, gum disease, or a history of failed implants may need a longer staged protocol.
General health also matters. Poorly controlled diabetes, active periodontal inflammation, heavy smoking, certain medications, and inadequate oral hygiene can affect healing. These factors do not automatically exclude treatment, but they may change the sequence, timing, and risk profile. A clear conversation before surgery is part of safe planning.
For patients considering implant treatment in Tel Aviv, the value of a structured plan is simple: every stage has a purpose, and no stage should be rushed simply to shorten the calendar.
A Calm, Planned Path to a Stronger Foundation
Bone grafting is often discussed as an additional procedure, but in the right case it is what makes an implant-supported result more stable, functional, and natural-looking. Careful diagnostics, microsurgical technique, protected healing, and well-timed implant placement turn a complex situation into a sequence of manageable clinical steps. The best next step is an examination with 3D planning, followed by a treatment plan that explains not only what will be done, but why it is necessary in your specific case.


